
Presentation


Arduino Code for this project
//********************************************************
// * PID Basic Example used as starting point with change below
// * Reading analog input 0 to control analog PWM output 6
// ********************************************************/
#include <PID_v1.h>
#define PIN_INPUT 0
#define PIN_OUTPUT 6
//Define Variables we'll be connecting to
double Setpoint, Input, Output;
double Input_Map,avg_meas;
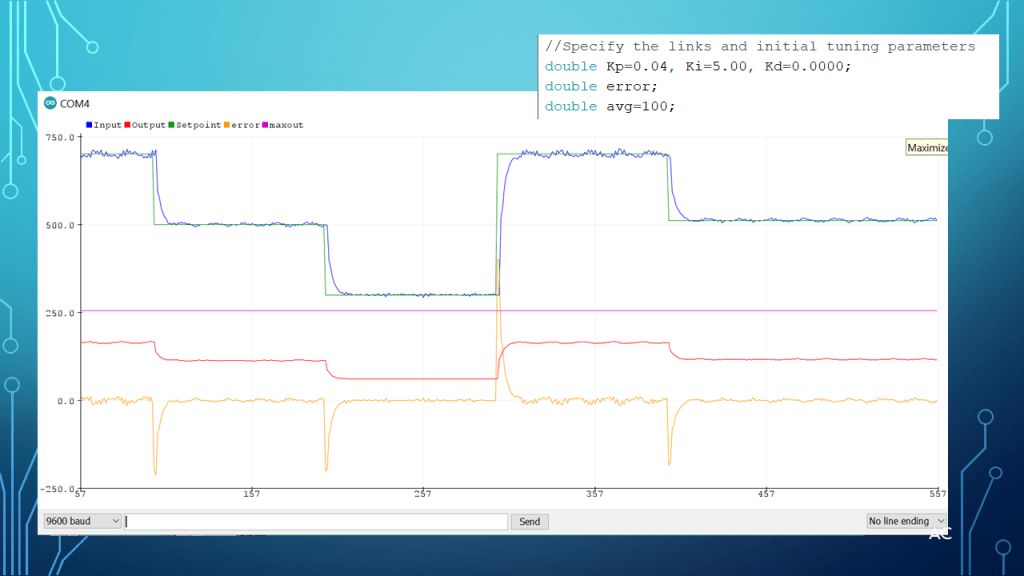
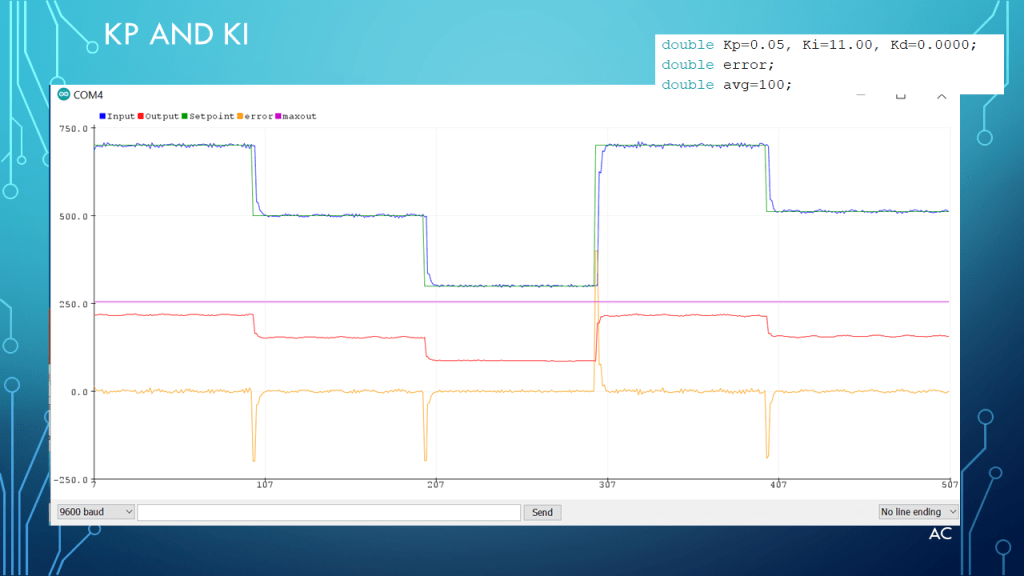
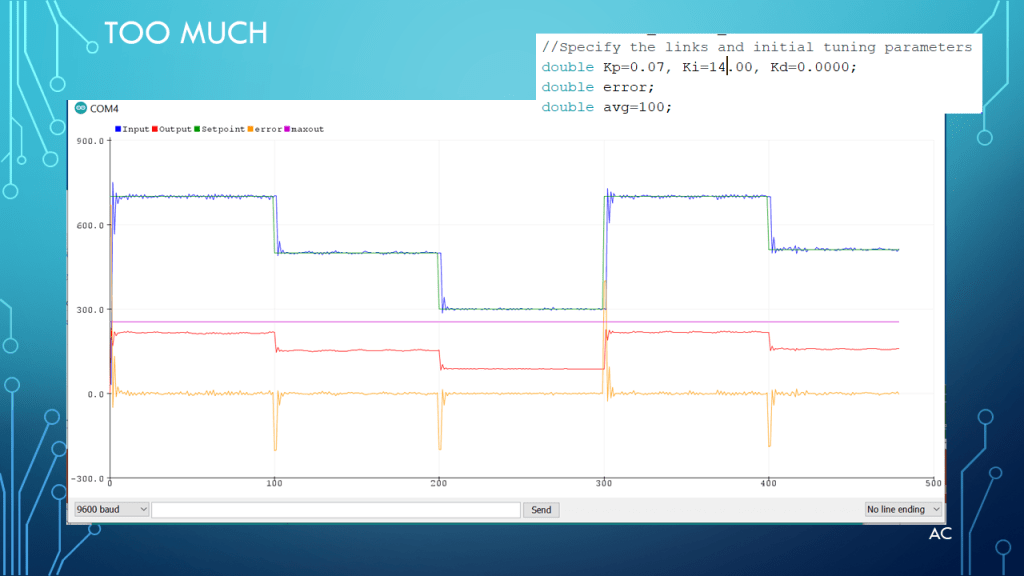
//Specify the links and initial tuning parameters
double Kp=0.04, Ki=11.00, Kd=0.0001;
double error;
double avg=100;
unsigned long Setpoint_change=0;
PID myPID(&Input,&Output, &Setpoint, Kp, Ki, Kd,DIRECT); //
void setup()
{
//initialize the variables we're linked to
Input = analogRead(PIN_INPUT);
Setpoint = 700;
Serial.begin(9600);
//turn the PID on
myPID.SetMode(AUTOMATIC);
myPID.SetOutputLimits(0,255);
myPID.SetSampleTime(20);
}
void loop()
{
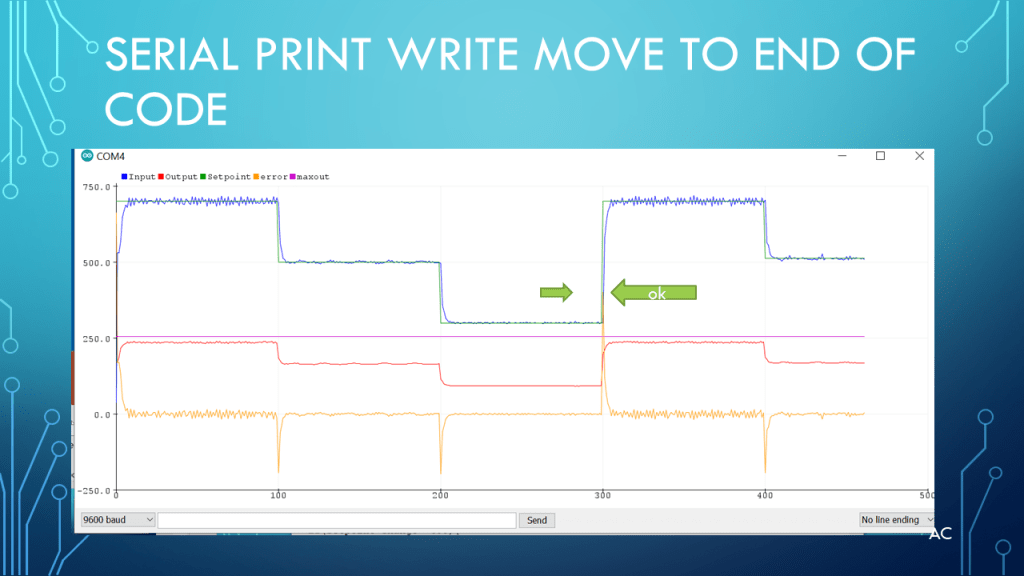
if(Setpoint_change==100){
Setpoint=500;
}
if(Setpoint_change==200){
Setpoint=300;
}
if(Setpoint_change==300){
Setpoint=700;
}
if(Setpoint_change==400){
Setpoint=512;
}
for (int i=0;i<avg;i++) {
Input_Map = analogRead(PIN_INPUT);
avg_meas=avg_meas + Input_Map;
}
avg_meas=avg_meas/avg;
Input=avg_meas;
myPID.Compute();
//delay(1); //ms
analogWrite(PIN_OUTPUT, Output);
Setpoint_change=Setpoint_change+1;
Serial.print("Input:");
Serial.print(Input);
Serial.print(",");
Serial.print("Output:");
Serial.print(Output);
Serial.print(",");
Serial.print("Setpoint:");
Serial.print(Setpoint);
Serial.print(",");
error=Setpoint-Input; //was input-setpoint but not traditonal
Serial.print("error:");
Serial.print(error);
Serial.print(",");
Serial.print("maxout:");
Serial.print(255);
Serial.println(",");
}
Zip code
Notes
- Presentation: Arduino® Uno with BB’s PID with Light and detect circuit
- Programming Language used: Arduino® IDE
- Hardware Use: Snapino™ (using the phototransistor), Keyes(using its One Led light module has transistor in its module) other jumper I got from MicroCenter store.
- Helpful resource: Stackoverflow, Search Engines , Bing chat AI, and Arduino communities.
- Bing is a Microsoft’s product.
- Arduino® ,Snapino™, and Keyes are products of respective companies
- Presentation shown to spark ideas of use.
- This presentation is not connected to or endorsed by any company.
- Use at your own risk.
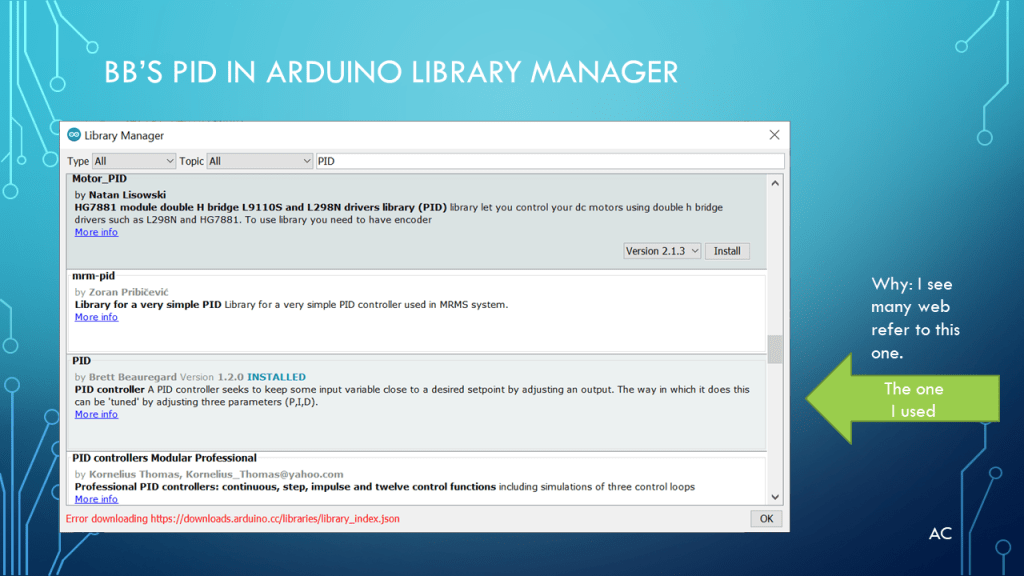
- Tags: PID, Kp, Ki, kd, derivative , integral, Serial plotter
- Title Tag: Arduino® Uno and BB’s PID
- Presentation is part of Blog content: https://testengineerresource.com/
